Sourdough Recipe for Beginners
How to Make Sourdough for Beginners

Ready to make Sourdough?
If you have been contemplating getting started, or have everything you need and yet to start or maybe you have made a few loaves already… you are in the right place!
I have been on this journey for over 6 months now and it has been the most healing and rewarding experience in the kitchen. To make fresh bread from scratch for your household is unmatched!
Before I got started, I felt overwhelmed, overcomplicated and procrastinated. So I have created this video and blog post to help you wherever you are at in your sourdough making journey. Even if you haven’t started yet, you are in the right spot!!
If you want to watch a full video on the process for visual support, click below! 👇🏼
First things first, we need to make sure you have all the proper equipment for this journey - I have laid out the list of must haves & optional tools below. This step is crucial as I didn’t know I needed all of this, so it halted my journey even more. (You can find everything on my amazon storefront as well!)
Click Here for my Full Amazon Storefront
TOOLS YOU WILL NEED
Active Starter or Discard (dormant dough) - option given below
Dutch Oven (5-6 qt. at least)
Glass Jars (2-4) I use both a 34 oz. and 1.9 qt jars (Ikea has it for cheap, linked below)
Sourdough Tool Kit, that includes:
2 bassonets
Dough whisker
Scorer
Scraper
Large bowl (stainless steel or glass)
Flour [I recommend the King Arthur Brand]
OPTIONAL TOOLS
Tea Herb Holder used to sprinkle flour
** the links are to exact products I use, and are affiliate links
Lets Talk Active Starter:
Yes, you can make this from scratch. No I have not done it.
I bought an dehydrated active starter from Sourdough Sparrow - for $15 and HIGHLY recommend you do the same!
It has been the biggest blessing of a starter, its so easy to make active and she truly triples in size!
CODE: tatiana_couto saves you 10%
Note: I also bought her course & cookbook - if you are interested click here to learn more!
CODE: tatiana_couto saves you 10%
NOW LETS BEGIN…
To preface, this is a 1-2 day journey, give yourself the space and time!
👉🏼 Pre step for those who are using discard or dormant dough from fridge: aka those who have not been actively feeding their starter
Take out your discard and let it come to room temperature
Feed your discard about 1 cup of flour and 1/2-3/4 cup warm water (not tap water) - wait 4-6 hours or until it has risen and breathing. (8:06 in video)
Once you have active starter that is breathing and alive..
Add 1 cup of starter and 2 cups of water into your stainless steel bowl and mix with your dough whisker. It should look like murkey water
Add 3 cups of flour and mix (measurements may vary based on where you live and your dough). Mix with your hands to tell if your dough is too wet or dry. (11:46 in video)
Cover with a damp tea towel and wait 45+ minutes
After, add 2 tsp of salt and 1 tbs water mix well with hands. You want to make sure the salt is evenly mixed.
Then do 8 stretch & folds rotating in bowl (pull part of the dough up, fold it over, rotate the bowl 90 degrees and repeat) add the damp towel and wait 1 hour (17:17 in video)
After the 1 hour go into another series of stretch and folds
Wait 1 hour then go into another series of stretch and folds
do about 3-4 folds within 3-6 hours
Put the damp towel back over the bowl and put it in the fridge overnight or for 12 hours
In the morning
Sprinkle flour on the surface you are working on. Pour the dough on top of the counter and do 8-12 lift and flip rotations. (put your hands under the dough on opposite sides, lift it and let the dough drupe over. Rotate your dough 90 degrees and let it flop back down on the counter, continue the process for 8-10 times. (22:08 in video)
Next, spread out your dough making it flat (this would be the step where if you wanted to add toppings to your dough)
Fold one side to 1/3 of the way and do the same on the other. Then roll it up and pull slightly each time to stretch it before you roll (23:23 in video)
Perform pull and tights for about 8-10 rounds. This can be done with your scraper, hands or both. (You are going to hold the dough in both hands, and slowly rotate it on the counter 90 degrees and then pull it towards your body. This will create tension in the dough and shape it) (24:11 in video)
Put the towel over your dough and let it sit there for 30 minutes
After, spread flour onto your banneton to prevent the dough from sticking. Then with your scraper, scoop the dough and fully flip it into the banneton.
Pinch the sides like an envelopes, grab each corner and pinch it to the middle so there are no creases (26:06 in video)
Put it in the fridge for at least 2 hours. It can stay til 72 hours with the damp towel on top.
When you are ready to cook:
Pre heat the oven to 475 degrees with the dutch over inside
Once preheated, take your dough out of the fridge and flip it on to a shet of parchment paper. (sprinkle flour on the bottom to prevent it from sticking)
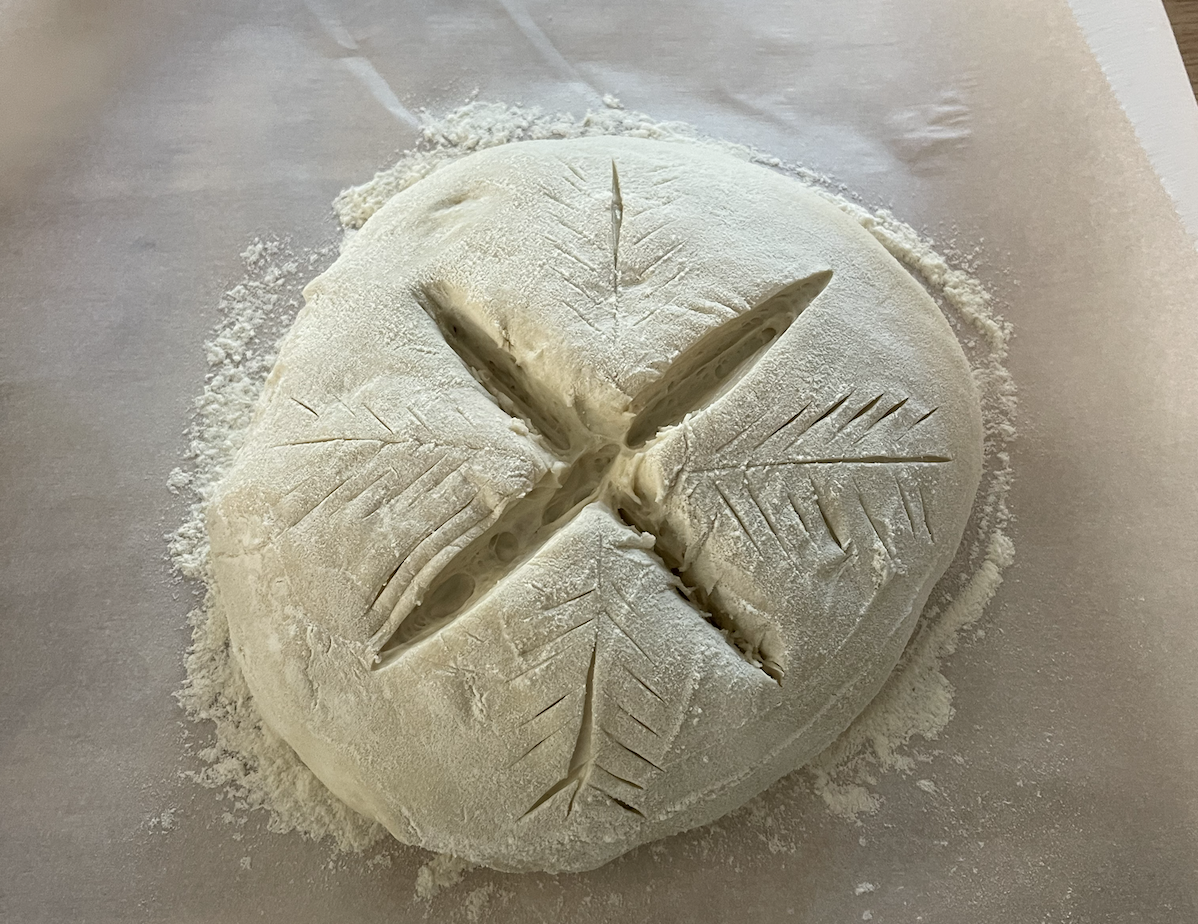
Sprinkle flour all over the top of your bread and score your bread, you can design it however you like but make sure to have 1-2 deep scores to help the bread fully cook. Add fine details for design (30:05 in video)

Bring your dough into the dutch over by carrying the corners of the brown parchment paper
Cook it with the lid on for 20-25 minutes at 475
Then take the lid off and cook for an additional 15-20 minutes at 450
Pull parchment paper and lay it on a cooling rack for at least 2-3 hours minutes before cutting it
Best way to cut is once cooled, put it in a bag in the fridge and cut the next morning!
Cut it up, toast it up and enjoy :)
If you want to make sure you are on the right track - watch the video below for step by step instructions!
I cannot wait for you to try - tag me on IG @tatiana_andreatta if you give this a try!
Please stay connected with me on my social platforms below!
Have the most Radiant Day! ✨
xoxo,
Tatiana

